Sunday, October 18, 2020

 Soccer


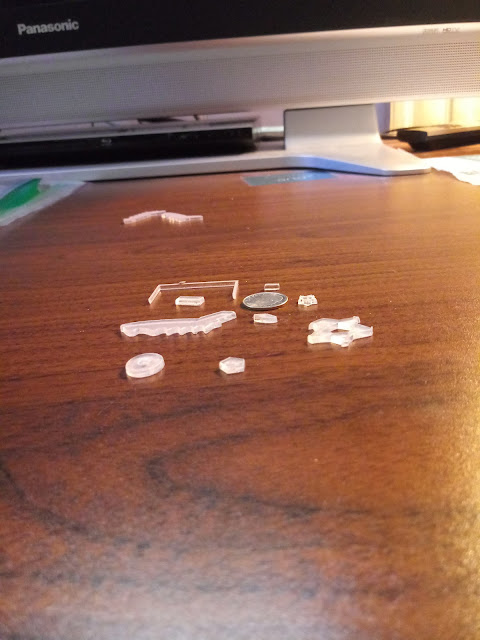
Here is the the colored outline of the original design plus photos of the final cuts. The laser was operating smoothly and the run took about 5 minutes. Again as for the hockey stencil, I found no charring, cracking or splintering on the edge or back sides of the plexiglass. This will make for a smoother trace with the pens.


It does not really affect the usage, but you'll notice some areas in the bottom photos where blobs of melted then hardened plexiglass are scattered around. In one case a polygon from the one of the larger soccer balls has its outline engraved in. The best explanation I can give is that the laser was set at power levels higher then I needed, and smaller hot pieces (or the beam itself) reached the larger shapes that had previously fallen into the catch tray.


Soccer field with balls, cleats, goals and markings


Friday, September 18, 2020

 Hockey artwork completed


I took about 3.5 hours and produced the following final piece. 

The pens used were:

Sakura Gelly Roll Classic Red M19, Blue M36, Black M49

Sakura Gelly Roll Metallic Gold M551, Blue M536, Green M526, Red M519, Silver M553

Signo Black

PIGMA fine tip red, blue, green and purple

The PIGMA fine tips were used for the goalie mask, the smaller crossing hockey sticks and the face off inner circles.


Sunday, August 30, 2020

 Hockey Stencil Cut and sketch booked


The lasers have been moved into their own dedicated room separate from the woodshop and metal working/welding area which makes for a better temperature controlled, quieter and cleaner work environment. Seth also recently recalibrated and cleaned the lasers after the renovation of the makerspace in early August and I enjoyed very clean cuts at low powers with no charring, burning or microcracking on the back side of the stencil. Notice that I am now using a light purple tape which is low tack/delicate removal 3M brand painter's tape (60 safe removal period). The run took almost 6 minutes to complete using 20 different layers, my most complex design to date.


Today I completed my coloring plan in my sketch book and next up is to actually do the drawing on 130 lb white cardstock. I toyed with the idea of using a wide 18 kt gold brush stroke to frame the hockey scene but decided against it because so many of the hockey objects are small and thin and the broad reflective strokes might clash with that fine detail. 


Monday, February 10, 2020

Fixing a stiff guide snake and air tubing to laser head

Fixing a stiff guide snake and air tubing to laser head


Seth and I worked on improving the large heavy bend in the stiff snake air tubing on the 4 inch focal length laser. The joints and vertebra on the hard plastic guide snake were growing stiff with time such that there was a large curl that would threaten to clip the underside of the top of the laser housing, at least when moving the gantry to the rear of the machine.

At first we thought that the 6 mm nylon tubing was getting stiff or hardened with use and time and so initially ordered a fresh loop of 20 ft tubing from Boss Laser. But after running the old tubing out and the new tubing in, we found the old and new tubing to be equally flexible, so we then knew the problem was due to the hard plastic snake guide. In fact, we found a number of vertebra cracked on the stretch closet to the laser head. We used cable ties (the broader the better) to flatten and secure the cracks and then inserted the metal spine of about 8 inches under the cable ties.

A combination of those broad strap cable ties and the thin straight metal rod were combined to keep the front part of the guide snake closest to the laser head lying much flatter. It is best to attach the cable ties so that the head of the tie faces up and not contact the gantry guides. We also checked that the metal spine did not hit any part of the system. This is a temporary solution until we purchase a new snake guide, including possibly one made out of metal which will be (1) heavier in loop formation with lower and tighter bends and (2) less likely to crack and easier to clean. The metal snake guide will need smooth edges to avoid scratching the tubing, especially during replacement.

The air regulator fitting at the laser head was in good shape and reused as is.

While we were at it, Seth cleaned the gantry rails and retreated with white lithium grease.

The entire task took about 2 hours.


BEFORE Repair


AFTER Repair


Wednesday, January 15, 2020

Hockey Stencil

This will be my most complex sports design to date because of the numerous details of the ice rink which I will reproduce almost 100% in full. I needed to expand the inner ellipse to allow for the extra detail not being too small.

There are 20 layers in total though some of them are just a straight cut.

The design can be in a vertical or horizontal orientation by simply rotating the sticks and the masks by 90 degrees.

I now keep a table of objects/layer name/layer color so that I do not accidentally assign the same color to two different objects/groups of objects.

An RDWorks simulation gives a run time of 11 minutes and 50% laser light on time.