Wednesday, March 14, 2018

coated aluminum and wood etching

Today we etched a logo into the painted surface of a thermos mug and a wooden sign.

Try to use the lowest power possible and only move up in power if the paint on your aluminum surface is very thick. We want to avoid reflecting the laser beam back in the direction it came from off the metal surface, as this could potentially damage the optics and laser tube by energy redirection.

A good choice for wood is 1/8 inch Birch which can be purchased for about $14 for a 5 by 5 foot square.

The rep rate range for our lasers is between 4 and 150 kHz. Use lower rep rates for smoother edge along cut lines and depths, and higher rep rates to cut all the way through thicker (> 1/4 '') materials.

A trick Seth taught us is to purposely defocus the laser after and autofocus by backing the the Z direction by 1-2 mm (move the bed downwards). This can save you time by making your cut lines purposely not go all the way through, while at the same time broadening ("bolding") the line. This will have roughly the same effect as a medium single pass scan, but much faster.


Tuesday, March 13, 2018

Rotary Roller Examples

Boss Laser recommends that on some occasions when shallow etching glass, whether on flat or rounded materials, you will be better served by first attaching wet non-shiny newsprint to the glass. The challenge is that the laser chamber is dry and with air flowing briskly during operation, the engraving run must be paused periodically to take a brush to re-wet the newsprint.

Here is a video showing Seth's engraving and the use of wet newsprint


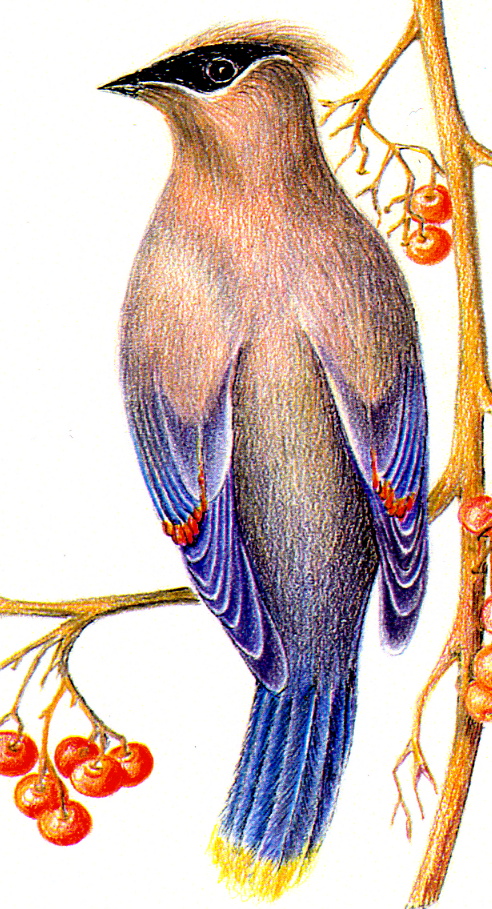
I have attempted to engrave a very detailed 5 inch bird onto a cylindrical 7 inch tall glass. I am now also engraving the main parameters of power %, scan gap interval in mm, and laser pulse frequency in kHz. This way when I engrave up to four birds on one glass, after several cycles of hand and/or machine washing, I'll know which set of parameters holds up the best.

Right now,  I am experiencing inconsistent results, even in back to back runs on the same laser with no change of tool position. I speculate that air flow consistency and possible soiling of the optical head on the relatively long 25 minute runs may cause deterioration of engraving performance. I tried to improve the former by standing attendant to the control knob on the compressor to even out the air flow manually as needed, but some flaking issues persist. I may also try wet newsprint. You can compare the two back-to-back engravings below.


First run ... relatively clean


Second run that same day, ... aborted due to excessive flaking.


Rotary Roller Tool

It is important that the laser is first completely off and powered down BEFORE disconnecting the Y-axis controller cable and replacing it with the cable to the rotary roller accessory. Failing to do so will result in the X/Y/Z limits to be incorrectly set when you have returned to linear mode after removing the Rotary Roller tool.


Materials

There is a company that sells waterproof papers

https://terraslatepaper.com/


laser engravable name bars, paperweights and card mount/holders. They also sell laser tape and Cermark tape, the latter can be used to engrave raised designs on uncoated metal.

https://www.johnsonplastics.com/


LED strips and bars for side illumination of cast acrylic etchings

https://www.superbrightleds.com/


3M company recently launches at thee CES show in January a free no account needed on-line tool to help determine what type of adhesive is optimal for joining any two substrates together. Though it is mainly geared to the medical device industry, the tool is easy and quick enough to work for any general purpose.

https://findmyadhesive.com/


Thursday, February 22, 2018

Speed Calibration Tests

We suspected that our head speeds on both the 2 inch and 4 inch focal length laser were slower by about a factor of 2 versus the parameters settings indicated in software. However, after running cut and etch tests on wood using Boss Laser standardized test files, we found agreement between the Boss Laser and Build RVA timings of within several percent. Therefore, I attribute our initial concerns to a bias prompted by the very ambitious simulation times indicated in the Preview feature of RDWorks.

The standardized laser  cut and engraving test files are found here.


 Engraving on Wood

Seth also proved us some practical guidance regarding setting up parameters for working with wood.

1. In the "Cut Optimize Handle" menu, engage the check boxes for (a) ordering, (b) working inside to outside and (c) auto determine. Set your height to 600 in an up to bottom configuration.

2. You can obtain the best results by scanning/engraving perpendicular to the wood grain.

3. Good choices of wood for working with the laser are Cherry and Alder.


Thursday, February 15, 2018

Optimizing Grayscale Images for Glass Etching


A multicolored bird is difficult to prepare because:

 (a) The combination of dark (black head) and light (pale yellow tail feathers) colors makes it mathematically more challenging to represent the full color range with just a single 8-bit color plane after posterizing. 

(b) The bird has a variety of shades even within a base color.

(c) The intricate detail and complex shapes of a biological subject pose challenges with respect to boundaries.

The main variables to change in Gimp are:

Brightness: decrease it to give faint areas a chance to etch.

Contrast: increase it to help with boundaries and offset the lower brightness so that you have a true zero for the white background (no etch) around the bird.

Number of posterizing levels:  a trade off between good boundaries and smooth color shade transitions.

The main variables to change in RDWorks are:

% power: a trade off between etching all the colors and losing detail.

Scan gap interval: a trade off of run time versus quality. Scan gaps on rotated media need to be a factor of 3 to 8 smaller than for flat media.

Speed: a 3 way trade off between waiting a long time for the etch to complete, the depth of the etch and the etch quality.

Warning: Make sure to change any brightness and contrast settings in Gimp BEFORE posterizing.

I will set up four g-code .rd files for permutations of 13% vs 17% power against 0.008 mm and 0.016 mm scan gap intervals running the 2 inch focal length laser on a cylindrical 7 inch drinking glass. I chose these parameters based a 2 hours worth of trial and see test cases on Gimp and RDworks simulations.

Finally, The gimp posterization process was independently verified in Octave, a shareware scientific and numerical programming development environment that can dissect image files down to the basic byte color values in all dimensions. For example, posterizing a gray scale image of values from 0 to 255 yields 6 levels at roughly evenly spaced gray colors of 0, 51, 102, 153, 204, and 255.


Tuesday, February 13, 2018

Etching Flat Glass

Seth and I I etched flat glass with a thickness of 3/32 inch using the 4 inch focal length laser at 20% power.  Our scan gaps were 10 one-thousands to 15/1000 mm and our nominal speed was 400 mm per second with laser frequency 10 kilohertz.

Operationally however, we observed that the laser head speed is more in the 150-175 mm per second range.  We are working with Boss Laser to try and troubleshoot the drop in speed vs. what is indicated in software and what is displayed in the on-board laser control screen.  This costs us wall clock time and is also affecting the quality of the work when the head is moving too slowly.


We also used wet newspaper to improve the quality of the thin segments of the design.  This is a clue that we learned from Boss Laser from their website in terms of optimizing results on glass.  We found because of the dry conditions and the strong air flow in the chamber that we needed to pause this scan several times so that we could take a wet brush and refresh the newspaper, as it was trying out quickly.

See this link for tips and tricks for etching glass:

You can go to this web page for Boss Laser suggested parameters for a variety of materials:


See this album for photos and videos of etching our glass

Warning: do not attempt to cut glass using the laser!  The glass simply cannot absorb that much heat in a short period of time and the result is that you'll have fractured and cracked glass with many splinters to clean up in the laser chamber.

Based on experience, we determined that will need to purchase some basic tools and supplies to help us while working with glass:

Toothbrushes
Eye droppers
Baking soda
Newspaper
Regular cleaning brushes