Monday, February 10, 2020

Fixing a stiff guide snake and air tubing to laser head

Fixing a stiff guide snake and air tubing to laser head


Seth and I worked on improving the large heavy bend in the stiff snake air tubing on the 4 inch focal length laser. The joints and vertebra on the hard plastic guide snake were growing stiff with time such that there was a large curl that would threaten to clip the underside of the top of the laser housing, at least when moving the gantry to the rear of the machine.

At first we thought that the 6 mm nylon tubing was getting stiff or hardened with use and time and so initially ordered a fresh loop of 20 ft tubing from Boss Laser. But after running the old tubing out and the new tubing in, we found the old and new tubing to be equally flexible, so we then knew the problem was due to the hard plastic snake guide. In fact, we found a number of vertebra cracked on the stretch closet to the laser head. We used cable ties (the broader the better) to flatten and secure the cracks and then inserted the metal spine of about 8 inches under the cable ties.

A combination of those broad strap cable ties and the thin straight metal rod were combined to keep the front part of the guide snake closest to the laser head lying much flatter. It is best to attach the cable ties so that the head of the tie faces up and not contact the gantry guides. We also checked that the metal spine did not hit any part of the system. This is a temporary solution until we purchase a new snake guide, including possibly one made out of metal which will be (1) heavier in loop formation with lower and tighter bends and (2) less likely to crack and easier to clean. The metal snake guide will need smooth edges to avoid scratching the tubing, especially during replacement.

The air regulator fitting at the laser head was in good shape and reused as is.

While we were at it, Seth cleaned the gantry rails and retreated with white lithium grease.

The entire task took about 2 hours.


BEFORE Repair


AFTER Repair


Wednesday, January 15, 2020

Hockey Stencil

This will be my most complex sports design to date because of the numerous details of the ice rink which I will reproduce almost 100% in full. I needed to expand the inner ellipse to allow for the extra detail not being too small.

There are 20 layers in total though some of them are just a straight cut.

The design can be in a vertical or horizontal orientation by simply rotating the sticks and the masks by 90 degrees.

I now keep a table of objects/layer name/layer color so that I do not accidentally assign the same color to two different objects/groups of objects.

An RDWorks simulation gives a run time of 11 minutes and 50% laser light on time.


Friday, August 30, 2019

University of Virginia Basketball Champions 2019!

This is my salute to the Men's basketball team for winning the National Championship.

Shown here is the Sketch book page where I planned out what colors to use and the details of how the various cut-outs from the stencil would either be filled in or left blank.

I used 9 different pens, including two blues and two oranges.

TT = Texas Tech
V = Virginia

and the final score 85-77 in overtime. For the letters and numbers I used standard commercially available stencils. The silver objects are TV Cameras.


Go Hoos!


The nets and ball seams were free-hand drawn.


Saturday, August 3, 2019

Basketball Stencil cut 
with 4 inch focal length laser

The laser power is still good but I did need to increase the percentage by 5-15% compared to the football themed stencil cut earlier this summer. There was a bit more haze on the outer cut edges too, however, by using clever placements of blades and backing tape, the usual stuck on white debris was almost non-existent. Unlike previous design cut jobs, I skipped my usual laser alignment and beam quality check.

For the first time, I avoided use of the exacto blade to cut my 10 inch by 12 inch plexiglass template rectangle. I decided to just make an RDWorks g-code file for that rectangle and let the laser cut it for me instead! While I had the file loaded in memory, I went ahead and cut several more until I exhausted my available space on the sheet purchased from Lowe's. This is a big time saver and avoids tedious manual labor.

It took 38 seconds to cut the rectangle. It took 4 minutes and 5 seconds to cut the full basketball design into the rectangle.

I suffered through a bit of confusion regarding how the on-board system differentiates the origin from the framing outline. Normally I set my design origin to be the upper right corner. I was working on a different computer that had the default changed to the design origin being dead center (the prior user likely was using a circularly symmetric design). Therefore, when I tried to use the on-board framing button on the laser, I got a "X Slop Over" error, which means that you are asking the laser head to position itself outside the bed boundaries. All I had to do was go back to RDWorks, reset the design origin to upper right, resave the Ufile and then all worked as normal with the on-board origin and the framing start point as one and the same. See my Blogsite section titled RDWorks for more details on this issue.

As a courtesy I am now deleting my uploaded g-code files from system memory after I finish the cut job. The on-board memory can only hold 99 files.

8.8 inches by 6.2 inches for the largest ellipse.


Usable stencil components


Cut out pieces


Smooth clean small cuts can be achieved with proper laser settings


I purposely tried a cut line close to tangential to the circle to see how tight the cut line would be. The circle held its own.


All the components in concentric positions and backing tape removed.


Friday, July 12, 2019

Basketball theme stencil


Today I needed about 3 1/2 hours to start from scratch to complete this Stencil design in VCarve Pro.

First, I created a 3 vertical oriented concentric ellipses template so that I can quickly use to build stencils down the road based on that layout. Remember, by keeping the ellipse sizes the same across designs, I can later mix and match for new patterns, without any new software design work or laser cutting.

The yellow objects are cameras and the light blue objects are uniform tank tops. The olive green objects at top/bottom are hoops with backboard connectors also drawn in. I made good use of the weld and intersect tools for those.

Learned several new tricks for VCarve Pro; see my VCarve Pro section of this blogsite for details. 


Tuesday, April 30, 2019

Football Field design complete


Today I finished the drawing of the football themed design. For this project I kept track of the hours involved in each stage of the process.

Software design in VCarve Pro: 4 hours
Laser file preparation in RDWorks: 2 hours
Laser prep, alignment check, test run and design run: 5 hours
Stencil cleaning, tape removal and review: 1 hour
Sketch book color planning; 1 hour
Drawing: 3.5 hours
Blogging at various stages: 2.5 hours
Total: 19 hours

9 pens for the drawing


sketch book


Football Field and Stadium


Friday, April 19, 2019

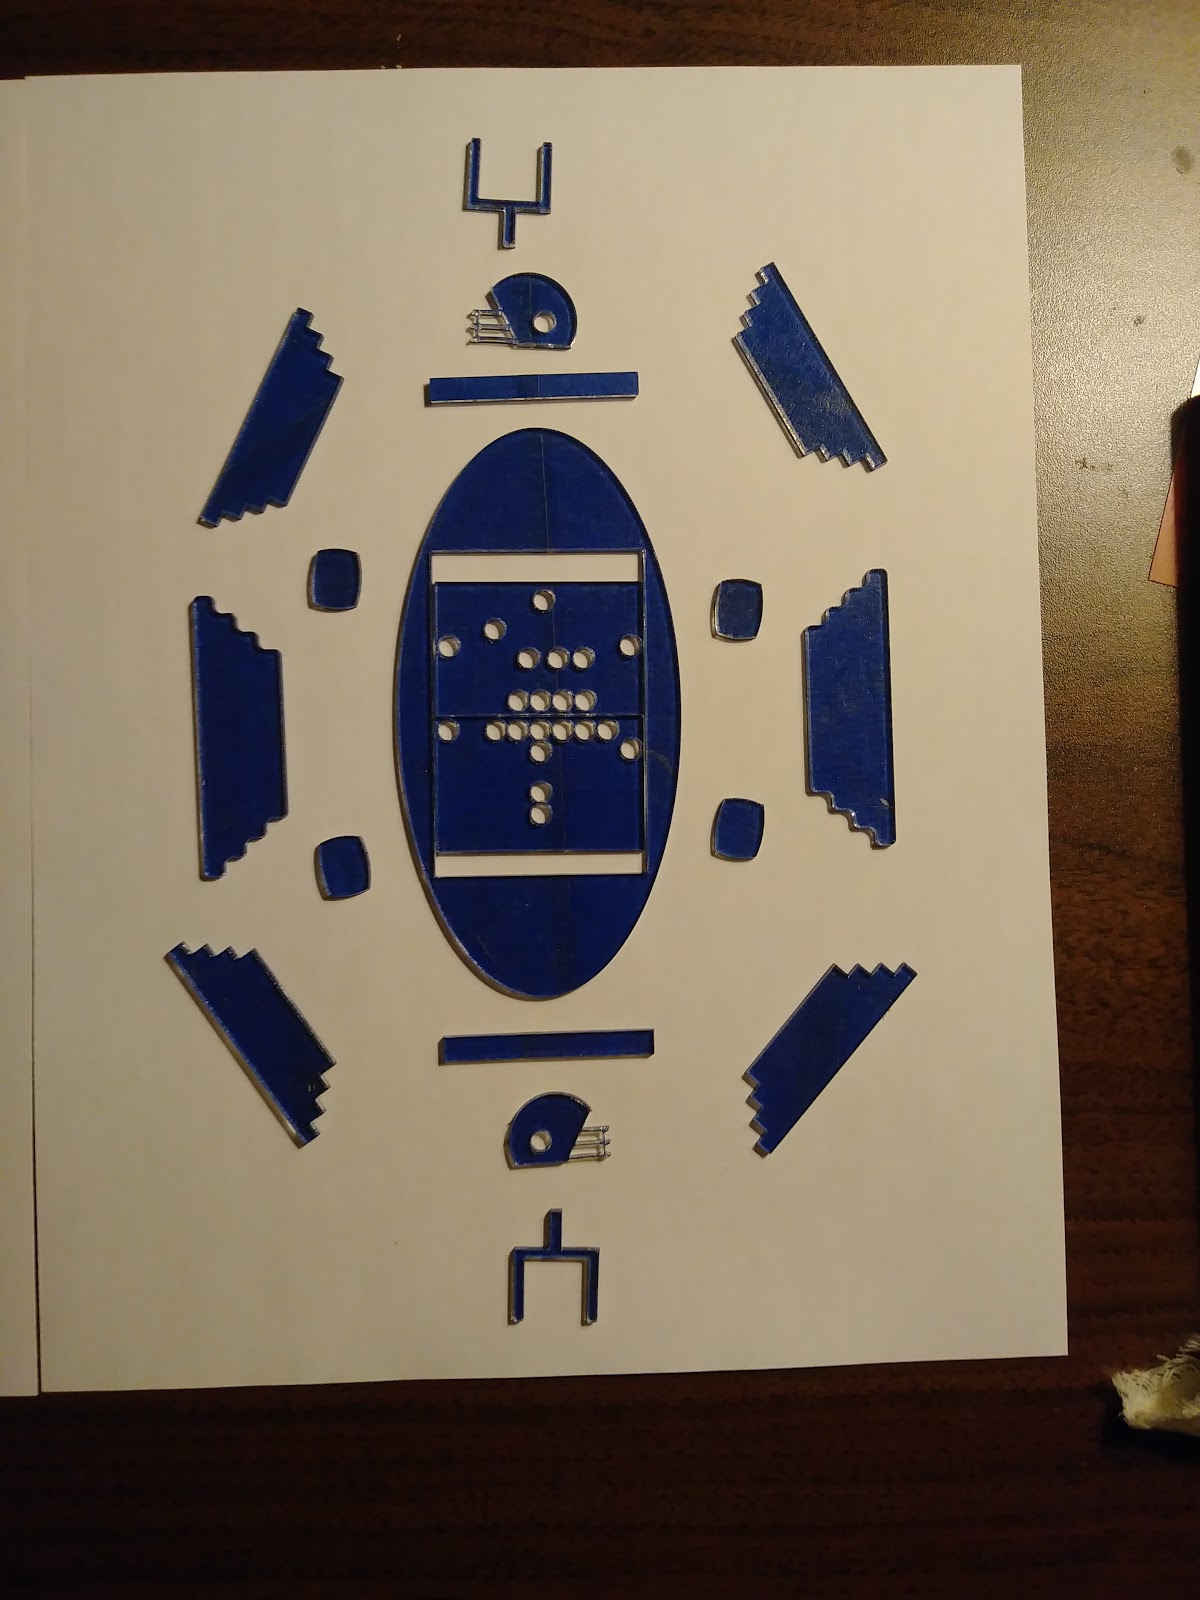
Football themed Stencil


Before starting, I did a thorough vacuum and wipe cleaning of the 4 inch focal length laser and the supporting components.

Then I ran my standard beam quality and alignment check. The operating condition at the moment is nearly perfect. The beam cross section is nearly circular at 12% power and even the beam halo is uniform. The beam is hitting center in a left to right sense, and slightly high of center in an up to down sense. This is the case for all 4 corners and the center of bed test points. The slightly high of center is actually preferred, as when the beam is reflected down from the 3rd mirror of the head into the focusing lens, it will be more centered (given the beam width).


Excellent laser alignment results

L: left, R: right, F: front, B: back

notice the uniform yellow halo around the burn spot


I ran a small 2 inch test file that represents the range of shape size/ head speed combinations to make sure I get clean cuts, but without using too power. Everything was good except the larger shapes with a 30 mm/sec speed needed a 7% increase in power to get a cut-through.

As a reminder when working with plexiglass, make sure the exhaust fan on the other laser is ON to prevent any odors of burnt plexiglass from seeping into the workspace.

I am extremely pleased with the overall results, especially considering that this was my most challenging design to date. I used a large number of very small circles and closely adjacent ovals to test the laser precision. The football helmet face-guard also has very thin lines criss-crossing that retained their shapes with cracking or splitting.


The major stencil parts


8.8 inches high. 6.3 inches wide.