Friday, July 12, 2019

Basketball theme stencil


Today I needed about 3 1/2 hours to start from scratch to complete this Stencil design in VCarve Pro.

First, I created a 3 vertical oriented concentric ellipses template so that I can quickly use to build stencils down the road based on that layout. Remember, by keeping the ellipse sizes the same across designs, I can later mix and match for new patterns, without any new software design work or laser cutting.

The yellow objects are cameras and the light blue objects are uniform tank tops. The olive green objects at top/bottom are hoops with backboard connectors also drawn in. I made good use of the weld and intersect tools for those.

Learned several new tricks for VCarve Pro; see my VCarve Pro section of this blogsite for details. 


Tuesday, April 30, 2019

Football Field design complete


Today I finished the drawing of the football themed design. For this project I kept track of the hours involved in each stage of the process.

Software design in VCarve Pro: 4 hours
Laser file preparation in RDWorks: 2 hours
Laser prep, alignment check, test run and design run: 5 hours
Stencil cleaning, tape removal and review: 1 hour
Sketch book color planning; 1 hour
Drawing: 3.5 hours
Blogging at various stages: 2.5 hours
Total: 19 hours

9 pens for the drawing


sketch book


Football Field and Stadium


Friday, April 19, 2019

Football themed Stencil


Before starting, I did a thorough vacuum and wipe cleaning of the 4 inch focal length laser and the supporting components.

Then I ran my standard beam quality and alignment check. The operating condition at the moment is nearly perfect. The beam cross section is nearly circular at 12% power and even the beam halo is uniform. The beam is hitting center in a left to right sense, and slightly high of center in an up to down sense. This is the case for all 4 corners and the center of bed test points. The slightly high of center is actually preferred, as when the beam is reflected down from the 3rd mirror of the head into the focusing lens, it will be more centered (given the beam width).


Excellent laser alignment results

L: left, R: right, F: front, B: back

notice the uniform yellow halo around the burn spot


I ran a small 2 inch test file that represents the range of shape size/ head speed combinations to make sure I get clean cuts, but without using too power. Everything was good except the larger shapes with a 30 mm/sec speed needed a 7% increase in power to get a cut-through.

As a reminder when working with plexiglass, make sure the exhaust fan on the other laser is ON to prevent any odors of burnt plexiglass from seeping into the workspace.

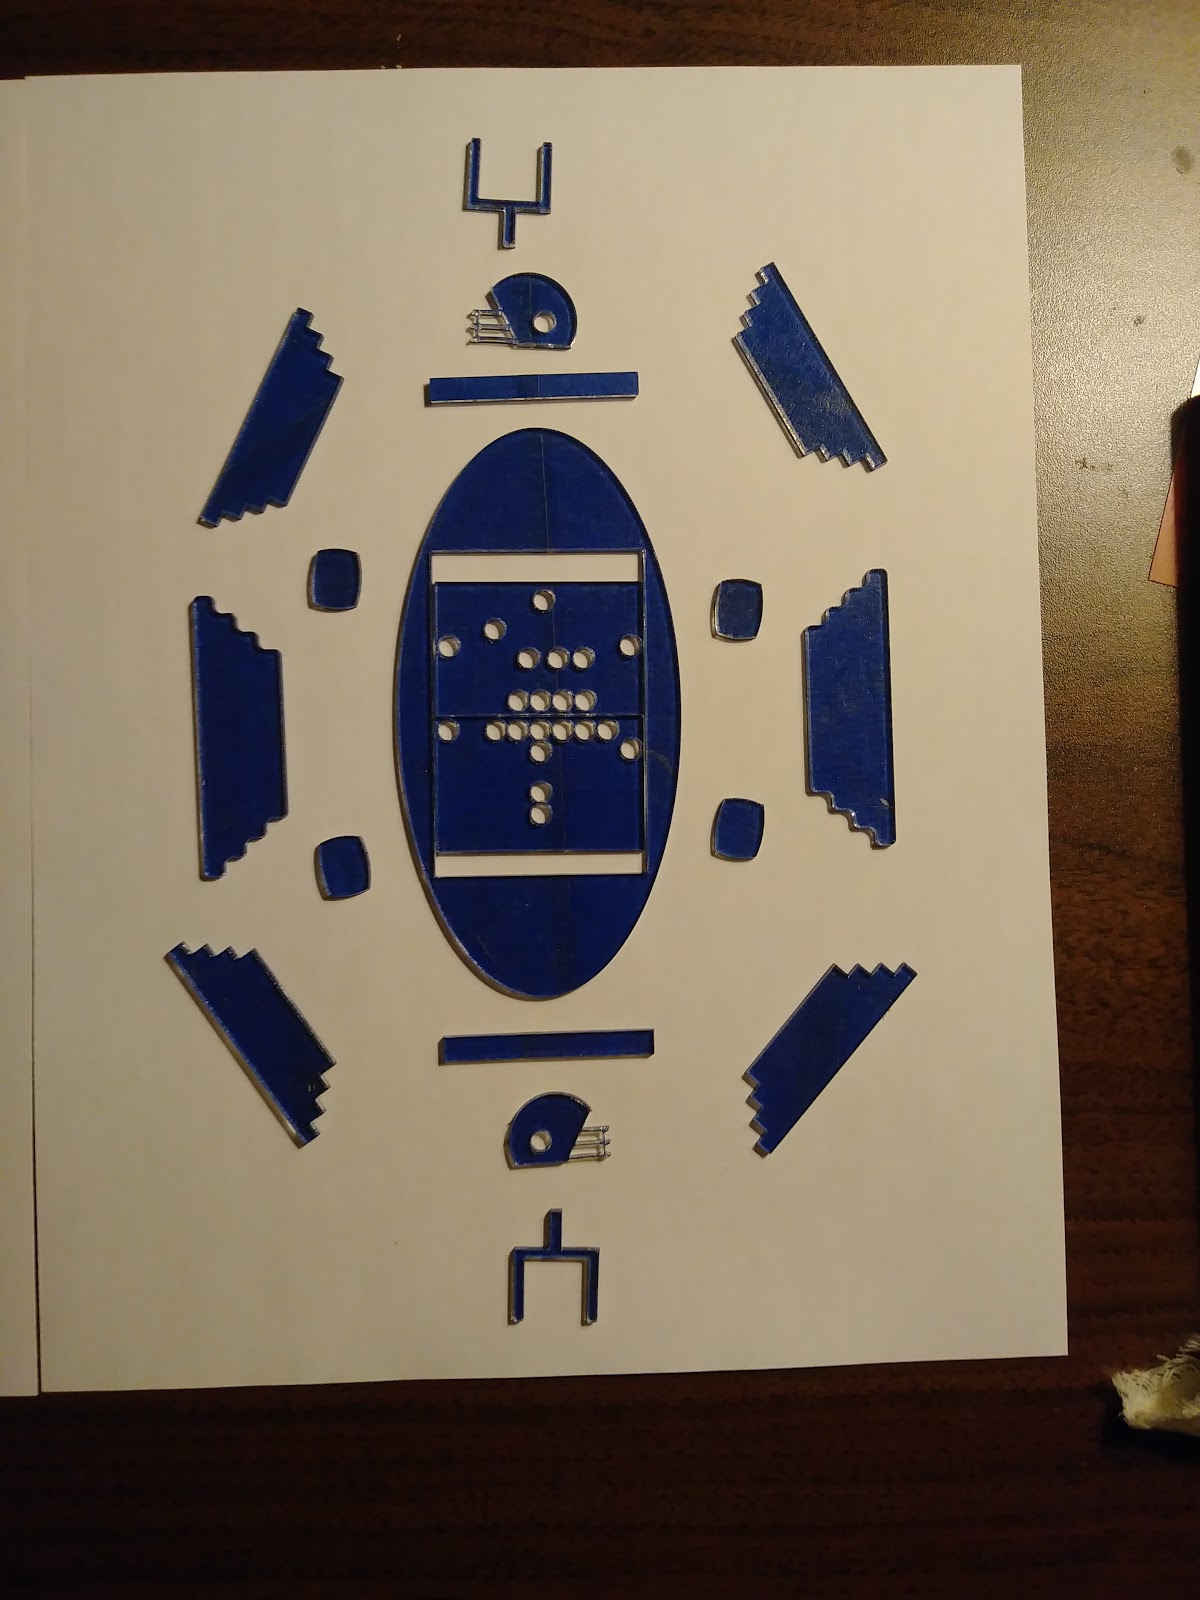
I am extremely pleased with the overall results, especially considering that this was my most challenging design to date. I used a large number of very small circles and closely adjacent ovals to test the laser precision. The football helmet face-guard also has very thin lines criss-crossing that retained their shapes with cracking or splitting.


The major stencil parts


8.8 inches high. 6.3 inches wide.


Wednesday, April 3, 2019

Ellipses in VCarve Pro

Be careful when creating ellipses in VCarve Pro and then exporting as dxf, ai or eps. VCarve Pro will make two identically sized ellipses superimposed exactly on top of each other. This creates havoc when you import into RDWorks and run a simulation, as the apparent priority layer order set by you may not be respected because of the double ellipses. Black is set as the default priority 1st color for layers, and the hidden layers will be colored black. Since you could not see them to color them anything else, the simulation will then do all the visually hidden ellipses as priority 1 ... and then go to your priority 2.

I even tried exporting out of VCarve Pro as a PDF which Inkscape can read, then exporting as dxf out of Inkscape. The problem of double ellipses still holds, but now the redundant ellipse has jagged edges and is merged with the true intended ellipse.

The work around without going back to VCarve Pro is to set the layer property for the ellipse to "hide yes" by double clicking on it in the Work Tabsheet. This will reveal the hidden ellipse as colored black; delete it. Then unhide (set "Hide = no") on the actual ellipse that is colored and you want to keep. Remember to File -> Save the changes before running a simulation.

You can see the issues with the images below. If the outlines in the image are dim on your view screen, just click on it to enlargen and darken.


There is an ellipse underneath the red inner ellipse.


The hidden ellipse is revealed.


See the hidden ellipse now has jagged edges after using Inkscape as an intermediate DXF creator.


Saturday, March 16, 2019

Football theme stencil design using VCarve Pro and RDWorks

I made heavy use of the Mirror copy, Weld, Interactive trim and boundary based Trim tools in VCarve Pro in putting together the design.

I'm trying smaller circles than any of my previous designs at 0.15 inches diameter.

Always remember to zoom in on intersection points in VCarve Pro that have been manually connected using the Validity tool and look for the square with + icon at the intersection points as verification.

Important: If you are experiencing incorrect geometries from imports of DXF files into RDWorks, make sure you go to Main Menu: Config -> File Para Setting and fill in the check boxes for "Import DXF text info" and "Import dxf point". Otherwise, you may get a variety of issues; in this case independent arcs getting connected into closed shapes and a large scaling down occurred. You may also try exporting out of VCarve Pro as an .ai file, which RDWorks can import dependably.


RDWorks: Config -> File Para Setting: check both DXF boxes


Here is what my stylized football object is supposed to look like


and here is a markup of what RDWorks does if the DXF options for  import are not set. The highlighted area shows where RDWorks (upon import) adds a connecting segment between the three shapes at the four "edges".


This was a problem on the Build RVA computer's installation of RDWorks that I was NOT able to reproduce at home on my laptop running Windows 10 and RDWorks V8.01.28. Next week when I am at Build I'm update this post with the RDWorks version installed there.


Monday, February 25, 2019

Baseball

Here I show the early design, an intermediate stage and the final drawing of my latest stencil of SymArt.

I attempted to raise the complexity of the design (my first oval stencil) and introduce an even larger assortment of colors and pen tip sizes into the final drawing.

This was my first attempt using 130 lb cardstock, to help reduce any buckling or stretching of the paper from the very wet inks, especially the metallic inks. The backside of the paper is very dry and even/smooth. I will likely use 130 lb cardstock going forward, as it also had firmer and smoother feel while drawing than 65 lb cardstock.

This drawing was the most time consuming I tried to date with my stencils, as I added blocks manually outside of the stencil using a ruler - semi-freehanded if you will.


Sketch book - note the numerous details and color trials


Early Outlines


intermediate stage


Variety of pens 


Baseball final artwork


Thursday, February 21, 2019

Baseball 


With MLB Spring training getting started and the opening day for the 2019 season only about 6 weeks away, I thought that a baseball themed design was in order.

I loaded the baseball theme design into the Boss laser LS2436 with the 4-inch focal length optics.

Here are some Lessons Learned:

To set up my standard 10 in by 12 in rectangular piece of plexiglass it's best to only remove the center eight blades.

I had to rerun the outermost oval (30 mm per second) for 15% power because at that speed my first try at 10% power did not cut all the way through. On the second run, the trick is to either set layers at 1% power, either on-board or in RDworks software, so that fall through layers do not get recut. Something very low say 1% power so the laser won't fire. Then only assign the higher power or the lower speed (or both) to the layer to be recut. In the future I'll avoid this problem and make sure my Concentric Circle test samples all of the head speeds that will actually be in the design run.

Note that we are no longer adjusting the compressor pressure away from the default set by the manager.

I am now deleting my files after I'm done. The on-board memory max's out at 99 files regardless of size.

The photos show that all the cuts are very clean. I report that there are essentially no cracks or divots on the back side, nor were there any burn or char marks (either on the backside tape or on the plexiglass). This is proof that the laser is well-aligned and has a good beam cross section. Additionally, there was very little rubbing alcohol & terry cloth cleaning that I needed to do on the surface of the plexiglass stencil parts; debris was kept to a minimum.

Design size is 8.8 inches by 6.3 inches


Outer oval and baseball, bat, field and scoreboard


middle and inner ovals


partial sampling of the small pieces